Human-Robot Interaction I // Neato Soccer
Today
- Human-Robot Interaction I: Search and Rescue
- Neato Soccer + Project Proposal Check-Ins + Studio
For Next Time
- Review the project description for Broader Impacts Phase 2
- In class discussions on Monday November 2nd
- Materials due Tuesday November 3rd (See Canvas Page)
- Read over the Machine Vision Project Document.
- Project Proposal is due on Wednesday October 21st at 9PM.
- Project Shareouts will be Monday November 9th in class
- Project Materials are due on Tuesday November 10th at 7PM
- Please provide feedback and weigh-in on an extra credit opportunity! Poll
Human-Robot Interaction: Search and Rescue
We’re going to be discussing a new topic related to the broader applications of robotics: human-robot interaction and collaboration. This is a vast space, which covers anything from humans using robots as extensions of themselves (as tools), to humans and robots interacting as equals on collaborative or cooperative teams.
Today, we’re going to start thinking about human-robot interaction in the context of one of the most cited “uses” of semi-intelligent robotics in modern academic literature: search and rescue. As your discussion unfolds, please fill in this survey.
A Scan of the Literature
In your table groups, open the following link to some open-source “Search and Rescue” academic literature. Each person should choose a different paper to skim (please don’t read the papers in complete detail!).
As each person skims, take note of the following:
- Is what is being sought named in the paper?
- Is the robot discussed “real” (as in, exists in the world)?
- Is the robot deployed in a “real” environment (as in, is it fully simulated, in a laboratory, or field tested)?
- When referring to “search and rescue” what other applications may be listed? Or what specific organizations or scenarios are mentioned, if any?
- Who funded the work?
- Is the robot or robot system mostly a “searcher” or a “rescuer”?
- Do the papers make mention of how human operations specialists will interact with the robot?
After you’ve each had an opportunity to skim, share out your results. Pay special attention to where there are similarities or differences between your robots. You might want to identify a few axes and map your different robots to these axes (please use the board for this!).
Intended Use
As you might notice in the first activity, the landscape of Search and Rescue robots can be quite broad – from clearly bespoke solutions to specific scenarios/teams, to general purpose robots. The latter cases are particularly interesting – what makes a search and rescue robot…a search and rescue robot, if not its form/functionality?
There are multiple ways in which a technology is operationalized for a particular use case:
- By fundamental design (e.g., the form or functionality is entirely niche)
- By licensing or IP controls (e.g., commercial, non-commercial, open-source, closed-source)
- By market controls (e.g., only selling to certain buyers, lease/renting/buying models)
- By partnership (e.g., robots are provided only to trusted partners, potentially with a point-of-contact or dedicated engineer to monitor use)
- Maybe others! (if you can think of some, let us know and we can add them here)
For these search and rescue robots you just discussed, consider the following in your groups:
- Can algorithms be designed to restrict their utility to these search and rescue applications; why or why not?
- In what way is an engineer responsible for considering unintended use of their system? What actions should they take (or not)?
- Assuming that an algorithm is free to use, what evidence should be provided that it works as expected? How should limitations of the algorithm be communicated?
Neato Soccer
This activity is designed to get you up-and-running with OpenCV and ROS with our Neatos to implement a simple sensory-motor loop using image inputs. Let’s play some soccer!
Set-Up
We’re created from starter code in the class_activities_and_resources repository. (Be sure to pull from upstream to get the latest!).
$ git remote -v
$ git pull upstream main
If the above did not work, make sure to add the upstream to your
class_activities_and_resourcesrepo with the following:git remote add upstream https://github.com/comprobo26/class_activities_and_resources.gitthen try the above lines again!
To avoid running into library errors, we need to make sure your environment is set up properly. These steps will ensure that you don’t run into numpy and opencv compiling issues when you run this example code.
$ sudo apt update
$ sudo apt upgrade
$ cd ~/ros2_ws/src
$ git clone https://github.com/ros-perception/vision_opencv.git
$ cd ..
$ rm -r build/ install/ log/
$ colcon build --symlink-install
$ source ./install/setup.bash
Connect to a Neato
Grab a Neato with your table group – make sure you pick one of the Neatos with a camera attachment on it! Note that all of this code will also work in simulation, so if you aren’t the one connected directly to the physical Neato, you can help with development and debug through the simulator tool.
$ ros2 launch neato_node2 bringup.py host:=ip-of-your-neato
You can visualize the images coming from the camera using rqt. First launch rqt.
$ rqt
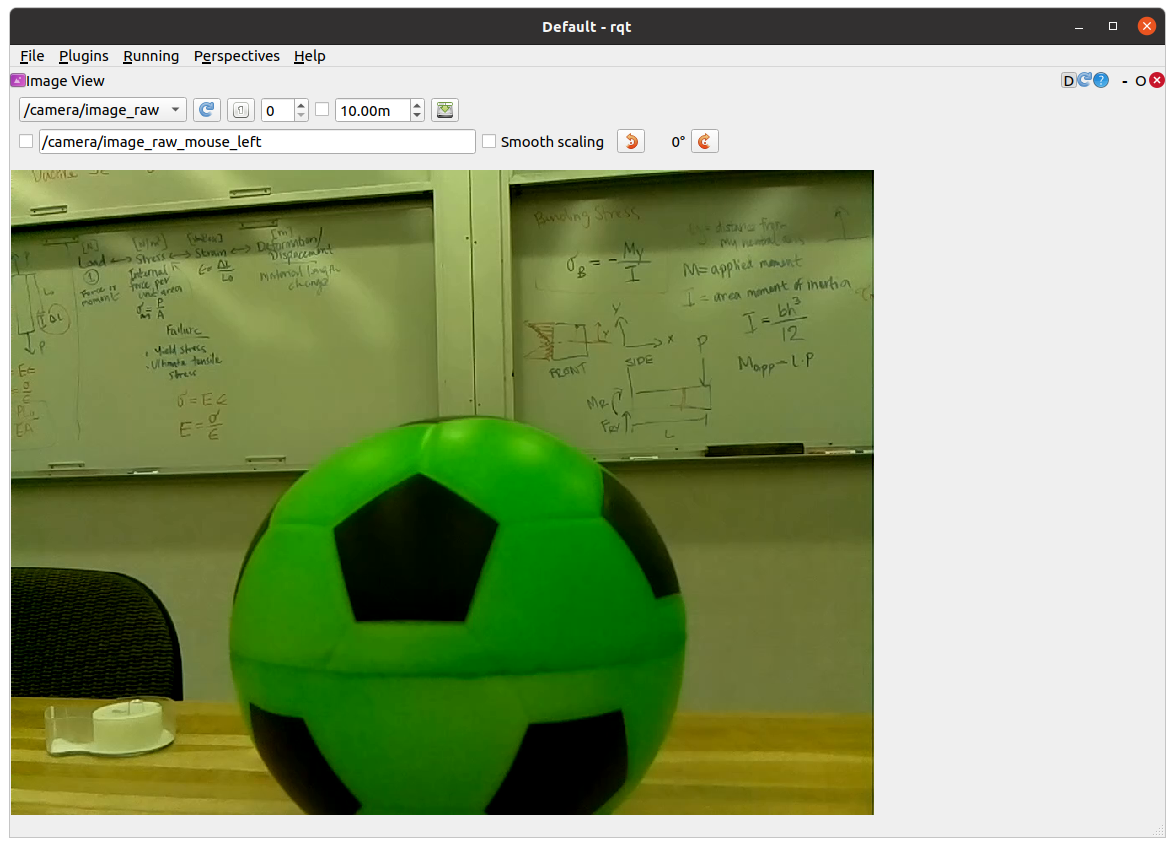
Next, go to Plugins, then Visualization, and then select Image View. Select /camera/image_raw from the drop down menu (Note: this will be /camera/image for the simulator). If you did this properly you should see something like the following on your screen:
OpenCV and Images as Arrays
In the class_activities_and_resources repository look in the neato_soccer package. There you will find a script called ball_tracker.py – this is where we’ll be developing in today’s activity.
The starter code leverages the OpenCV library to handle images; currently the node subscribes to an image topic, and then uses the cv_bridge package to convert from a ROS image message to an OpenCV image.
An OpenCV image is just a numpy array. If you are not familiar with numpy, you may want to check out these tutorials: numpy quickstart, numpy for matlab users. Since an image is just an array, you can perform all sorts of standard transformations on your image (rotation, translation, kernel convolutions) just like you would any other matrix!
Activity: Have a look at
ball_tracker.py– what is being subscribed to? What libraries are being used? What is the architecture of the node? Look up anything that is unfamiliar to you!
Run the starter code (ros2 run neato_soccer ball_tracker) and you’ll see the dimensionality of the numpy array of your image printed out from run_loop. In process_image you’ll notice that the encoding of the image is bgr8 which means that the color channels of the 1024x768 image are stored in the order blue first, then green, then red. Each color intensity is an 8-bit value ranging from 0-255.
If all went well, you should see an image pop up on the screen that shows both the raw camera feed as well as a color filtered version of the image called “binary window”.
Note: do pay attention to how OpenCV is being used in your node to generate visualizations. A very easy bug to introduce into your Opencv code is to omit the call to the function
cv2.waitKey(5). This function gives the OpenCV GUI time to process some basic events (such as handling mouse clicks and showing windows). If you remove this function from the code above, check out what happens.
Filtering Based on Color
We want to identify our soccer balls in our streaming images from the Neato. There are many, many, many ways this could be done, but for the purposes of this activity, we’ll be performing color-based filtering.
In the starter code, color filtering and its resulting image is produced using the cv2.inRange function to create a binarized version of the image (meaning all pixels in the binary image are either black or white) depending on whether they fall into the specified range. As an example, here is the code that creates a binary image where white pixels would correspond to brighter pixels in the original image, and black pixels would correspond to darker ones
self.binary_image = cv2.inRange(self.cv_image, (128,128,128), (255,255,255))
Notice that there are three pairs of lower and upper bounds here, where each pair specifies the desired range for one of the color channels (remember, the order is blue, green, red). If you are unfamiliar with the concept of colorspaces, you might want to do some reading about them!
Activity: Your next goal is to choose a range of values that can successfully locate the ball. In order to see if your
binary_imagesuccessfully segments the ball from other pixels, you should visualize the resultant image using thecv2.namedWindow(for compatibility with later sample code you should name your windowbinary_image) andcv2.imshowcommands (these are already in the file, but you should use them to show your binarized image as well). We suggest looking at the TODOs on lines 36 (initializing variables for the thresholds), 53 (making trackbars for user input (optional!)), and 81 (updating the binary image filter with the user specified thresholds).
Tips for Interactive Color Filtering
Any interaction with Opencv’s GUI functions (e.g., cv2.namedWindow or cv2.imshow) should only be done inside of loop_wrapper or run_loop functions (this is because you want to interact with the UI of OpenCV from the same thread).
White pixels will correspond to pixels that are in the specified range and black pixels will correspond to pixels that are not in the range (it’s easy to convince yourself that it is the other way around, so be careful).
We have added some code so that when you hover over a particular pixel in the image we display the r, g, b values. If you are curious, we do that using the following line of code.
cv2.setMouseCallback('video_window', self.process_mouse_event)
We then added the following mouse callback function.
    def process_mouse_event(self, event, x,y,flags,param):
        """ Process mouse events so that you can see the color values
            associated with a particular pixel in the camera images """
        image_info_window = 255*np.ones((500,500,3))
        cv2.putText(image_info_window,
                    'Color (b=%d,g=%d,r=%d)' % (self.cv_image[y,x,0], self.cv_image[y,x,1], self.cv_image[y,x,2]),
                    (5,50),
                    cv2.FONT_HERSHEY_SIMPLEX,
                    1,
                    (0,0,0))
One piece of good practice when using OpenCV – especially as you are learning! – is to use interactive GUI elements to set your function values. Here, you may want to add sliders to set your lower and upper bounds for each color channel interactively (we note this in the TODO on line 53). If you’re using ROS, you could alternatively use ROS parameters and dynamic_reconfigure!
To create an interactive GUI in OpenCV in ROS, you’ll want to make some new functions and “callbacks” in your Node. You can add a trackbar in your loop_wrapper function with the following syntax:
cv2.createTrackbar('red lower bound', 'binary_window', self.red_lower_bound, 255, self.set_red_lower_bound)
This code creates a Trackbar with the GUI text red lower bound within the binary_window display. It sets the lower bound to be a class attribute variable self.red_lower_bound which keeps track of the values set in the code and by the trackbar. The upper limit for the trackbar is fixed at 255 (since this is for setting the lower bound, we fix this upper limit). Then a function self.set_red_lower_bound is triggered as a callback whenever a user interacts with the trackbar. To create the callback, use the following code:
    def set_red_lower_bound(self, val):
        """ A callback function to handle the OpenCV slider to select the red lower bound """
        self.red_lower_bound = val
All that remains is to modify your call to the inRange function in run_loop to use the attribute you have created to track the lower bound for the red channel.
Remember the channel ordering! In order to fully take advantage of this debugging approach you will want to create sliders for the upper and lower bounds of all three color channels.
Here is what the UI will look like if you add support for these sliders.
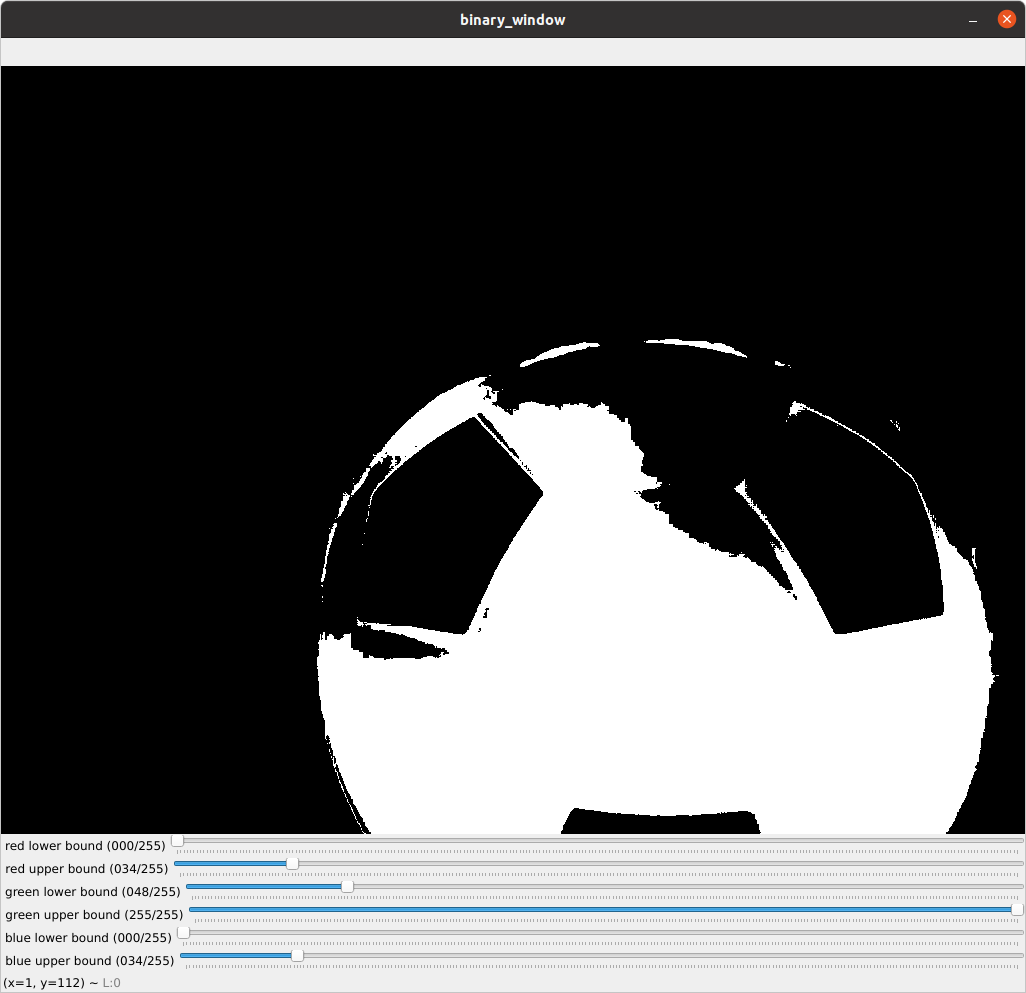
The code that generated this visual is included in the neato_soccer package as ball_tracker_solution.py. You can run it through the following command.
$ ros2 run neato_soccer ball_tracker_solution
If you find the video feed lagging on your robot, it may be because your code is not processing frames quickly enough. Try only processing every fifth frame to make sure your computer is able to keep up with the flow of data.
Dribbling the Ball
There are probably lots of good methods for controlling your Neato to interact with the ball, but we suggest using a simple proportional controller that considers the “center of mass” of your filtered image to set the angle that the Neato should turn to move towards the ball as a good first step…
Activity: When you click within your video feed, the robot’s motion should be toggled. The Neato should move forward and toward the ball when the Neato is triggered to move.
Tips for Playing Ball
We can use a technique called visual servoing which turns a robot so that an object of interest remains centered in its image frame. To compute the rate at which your Neato should turn, you need a way to measure the distance between the center of your filtered object and the center of the image.
To compute the center of mass in your binarized image, use the cv2.moments function. Take a second to pull up the documentation for this function and see if you can understand what the code below is doing. You can easily code this in pure Python, but it will be pretty slow. For example, you could add the following code to your process_image or run_loop functions (see the TODO at line 84!).
        moments = cv2.moments(self.binary_image)
        if moments['m00'] != 0:
            self.center_x, self.center_y = moments['m10']/moments['m00'], moments['m01']/moments['m00']
When doing your proportional control, make sure to normalize self.center_x based on how wide the image is. Specifically, you’ll find it easier to write your proportional control if you rescale self.center_x to range from -0.5 to 0.5. We recommend sending the motor commands in the self.run_loop function (see the TODO at line 85!).